Thursday, June 30, 2011

Repurposing: Craft By Using What You've Got


Sparky and I are still very much in the furnishing and decorating phase of the renovation (not to mention the painting phase...ahem) and we're on the look out for quirky bits and pieces to adorn the walls. Proviso: we don't have a lot of cash to spend on this stuff at the moment, so we've been looking at what we already have and ways to reuse and repurpose it into wall 'art'(?).

I subscribe to frankie, and every issue they include a pretty wall poster by an emerging artist. Last issue was a world map, which I loved. I'm kind of past the whole "stick posters to the wall with Blutac" thing - it just reminds me of my high school days way too much (Jonathan Taylor Thomas, I'm talking about you in particular) but I wanted to see it on the wall somehow.

I dug around in my project box (where I keep odd photo frames, cardboard, paper and fabric offcuts etc) and found some old white frames that I've lost the glass for. Perfect! I cut the map to fit and presto! I already had another white frame decorated with felt offcuts, which coincidentally matched the map colours well, so I think I'll hang these three together somewhere.

From these...

...to these!

I did something similar with more felt offcuts a few weeks ago, and while the photo is craptacular, I'm actually really happy with the result. I showed the mirror repurpose a few weeks ago, and these pieces are just continuing the theme.


Isy helped me with the top right-hand piece, hence the reason it's much more beautiful than the others.

I really love being able to pull things together from scrap and leftovers. Sure, it's not high art. It's probably not even art at all. But I love it nonetheless.

Green Cleaning Toolkit: The Whole Shebang


I've gone through the major elements in a good green cleaning toolkit over the past few weeks:
and figured I'd add the remainder to this post, because they're not used as often as the four major ones above.

Washing Soda

Find it in the laundry aisle at the supermarket.

Laundry: Use it in your homemade laundry detergent.
Laundry Brightener: When washing with castile soap, I add a couple of tablespoons of washing soda for all loads except darks. It helps brighten and soften the clothes and I think they smell fresher.

Salt

Regular, household salt.

Laundry: Add 1/3 cup to your dark laundry loads to preserve the black in your garments.

General Cleaning: Combined with castile soap, water or lemon juice, salt makes a really effective soft scrub for sinks, basins and benchtops that need a good, deep clean. (I generally tend to use bicarb and vinegar for this though, but it's a good alternative.)


Various Essential Oils

Make sure to purchase essential oils, rather than scented oils, as the latter can be almost as harmful to your health as the chemical cleaners you're trying to avoid. It's also worth checking that you don't have an adverse reaction to any particular oil before using it all over the house. Additionally, pregnant ladies need to be cautious around essential oils as some can stimulate labour.

Laundry: Add 10 drops to your rinse cycle for beautiful smelling clothes. Plus some oils, like tea-tree and lavender, have antibacterial qualities, making them great to wash things like fabric nappies.
General Cleaning: Add a few drops to your homemade cleaners for a nice change.
General Cleaning: Add 20 drops to a spray bottle and use as a room freshener.
Dusting: A damp microfibre cloth sprinkled with a few drops of lavender oil makes the whole room smell lovely. Lame, but true.


Equipment

Cloths

Washable Chux cloths: Generally once they're done in the kitchen, I wash them and add them to the cleaning cupboard. They're reusable and do a good job of tackling most tasks.

Microfibre Cloths: $3 for a pack of four at the Reject Shop. Get some. I use a damp cloth to do all my dusting, plus they clean glass and make rinsing and wiping out basins, vanities, baths and showers super easy. They are brilliant. Plus you just throw them in the wash and use them time and time again.

Spray Bottles

Spend a little bit extra and get the good spray bottles from Bunnings or somewhere similar. The cheapies are fine for mild cleaners, but I found that when I put vinegar in them, the spray mechanism would stop working after a week or two. I bought some Oates ones about a year ago and haven't had any issues since.
There really isn't much involved in getting your green cleaning toolkit together, and it becomes second nature really very quickly.

Let me know if you have any specific questions or things you use in your green cleaning. I'd love to get some more ideas!

Wednesday, June 29, 2011

Renovation Nation: Painting...Still


Last weekend was chock-a-block full of projects, which suited me just fine. (I love, love, love a good project.) Sparky oiled the back decks (more on that below) and I started painting the front door and kept working on the neverending job of painting the timber trim.

The front of the house (paint-wise at least) is nearly finished - hopefully this weekend will see the end of that particular task - and while we still have a shedload of painting to do, to see something finished has really spurred us on.


On Sunday I picked up a tin of enamel paint for the front door (Blue Lobelia by Dulux) and gave it the first coat. Gotta say I'm really really pleased with the colour so far. To have a painted front door is ridiculously satisfying!

The colour is pretty vibrant and the paint-shop guy told me I would've been better off using a grey undercoat instead of white, but you live and learn. It just means I'll probably need to do three coats instead of two.


Sparky also finished the deck with Organoil, and it has come up so beautifully. By his account it's super easy to apply and I love the fact that it's non-toxic and smells like eucalytpus oil. Two initial coats are needed, then one in six month's time. After that we should be able to go 12 months between oiling.


 You can see the difference between the oiled timber and the raw new deck.

I also spent some more time finishing off the paving. When we took out the garage and the slab, there was a whole mess going on with the border, so we tore it up and I'm in the middle of relaying it. Not a huge job but it's getting us closer to the end!

(Also note the chalk drawings. Excellent time consumer for toddler and mum alike.)

Current Status:

- Construction is done for now. We will put a roof over the new deck eventually and have to build a storage shed/studio in the backyard at some stage in the next 12 months or so, but no real rush.
- The back deck is finished. Just need to tidy up some loose ends and get us some retro cane armchairs to do some lounging on.
- I've started a master plan for the gardens and will slowly start to work on the beds as time allows. I've had to finish off some paving jobs, but they're nearly done now - thankfully.
- We've decided on the kitchen renovation plan now - a cheapy refurb rather than an all-out replacement, which makes me happy. (Buying further into the K.I.S.S philosophy: Use what you've got before looking for brand-new replacements.) As a result, I'm now stalking eBay for second-hand shelving, a butcher's block and a stepladder.
- We still haven't finished painting inside, but we'll get around to it eventually. Everything is undercoated, so if you squint it kind of looks painted.
- Slowly figuring out how best to furnish the new space and, again, stalking eBay for a mid-century lounge, some wireframe chairs, a dining table and a bookshelf.

Tuesday, June 28, 2011

Cheap-As Tuesday: Chicken and Mushroom Casserole

This is what Sparky and I like to call, "A bogan special," meaning it's a bit low-rent but a lot delicious, so who cares. Plus, I've been called worse than a bogan over the years!

It's easy, comforting, tasty and Isy eats it, so it floats my boat - especially this time of the year!

You'll need:


nob of butter
1 onion, sliced
1kg chicken thigh, trimmed
a few good handfuls of button mushrooms, sliced
2 tins of cream of asparagus soup
brown rice, to serve

1. In an ovenproof pan (we use a cast-iron one and they are the best things ever) heat your butter on a high heat and add the onion. Cook until soft.
2. Add your chicken, trying to get some of each fillet on the base of the pan. You want to brown it well, to seal the flavour in. It doesn't matter if some sticks to the base of the pan - that's where the flavour comes from.
3. Add your mushrooms and soup. Combine and bring to the boil.
4. Pop the lid on and put the pan into a moderate oven (180C). Cook for 45min-1 hour. 

We have ours with brown rice (and some steamed veges are a good idea too - the plate is fairly beige without them!)

Easy-peasy!

Monday, June 27, 2011

Green Cleaning: Make Your Own {Green} Laundry Detergent

Bubbles via NotTooCool on Flickr

One of my sisters gave me a bottle of her homemade laundry detergent a couple of months back and I was super impressed with how well it worked. I've been meaning to share her recipe ever since (hope you don't mind, Pangus!)

It's really easy and these quantities will make you 8 litres of liquid, so feel free to halve everything if you're not in need of so much. Although it does keep well over time.
You'll need:

1 cup Lux soap flakes
1/2 cup Lectric wsahing soda
1/2 cup borax
water
a large bucket
4 x 2-litre bottles or 5-6 empty vinegar bottles (try 2L milk bottles - as long as they're well cleaned)
1.  Using an old saucepan heat 4 cups of water with the Lux and stir until completely melted.
2.  Add washing soda and borax to mix and stir until dissolved.
3.  Add 4 cups of hot water to large bucket.
4.  Add the Lux, water, washing soda and borax mix to large bucket and stir. 
5.  Top the mix up with cold water till you reach 8L.
6.  Distribute mix amongst your storage bottles leaving enough room at top so you can shake your liquid. (The mix will settle and go claggy so make sure you give it a good shake before you use it.)
Tips: 
  • For a front-loader, use around 3/4 cup per wash. A top loader may use a bit more. 
  • In the fabric softener dispenser I always put 1/2 cup vinegar as a rinse agent/softener, and you can also add up to 10 drops of essential oil, to gently fragrance your wash.
  • Still pretreat stains in the usual way (I use this natural stain remover)

Thursday, June 23, 2011

K.I.S.S: How Not To Worry

A little bit light-hearted, but I love this. Let's all give it a go! (BoingBoing Via Root Simple)


Wednesday, June 22, 2011

K.I.S.S: Organising the Kitchen


I'm not a natural-born organiser. In my natural state I'm more of a seat-of-the-pantser, but I find that ridiculously frustrating and know that I do much better at life if I'm at least semi-organised.

So as part of the Great Experiment I've decided to put effort into organising my life, bit by bit.

Over the weekend I tackled the pesky drygoods cupboard. You know the one where you shove random bags of brown sugar, cocoa, flour and breadcrumbs in amongst bottles of food colouring, vanilla essence and loose sultanas that have fallen out of their box? Yeah, that cupboard.

It's not rocket science, but I had a strategy in place to tackle it, and it meant a grand total of ten minutes (shopping time extra, but it doesn't count because I went and had a coffee: bonus!) and I was done. And felt amazingly satisfied!
1. Listed everything I had stored in the cupboard
2. Figured out what sized container I needed to accommodate a full bag+
3. Armed with the list I went shopping for the containers I needed (what price is organisation? For me, $30! Thank you, Big W).
4.Transferred everything to its container and labelled each one. (OK, an admission, I haven't actually done the labelling yet, but I will. Because it is very, very important......)


That's it. Simple, I know. But even so I had put off doing this for ages because it felt like such a sucky way to spend my time. But now that it's done, it really does make a difference. It's easier to see what I have, what I need and what I have inadvertently bought 6 bags of (yes, you, desiccated coconut). Plus now I don't have to dodge a cascade of cocoa every time I get something off the top shelf!

Tuesday, June 21, 2011

In The Garden: Getting Some Winter Colour Action

Winter is typically a time of the blahs in the garden, and most corners of our backyard would concur, but we do have a couple of bright spots, which I take a ridiculous amount of pleasure from. I go out and visit them every day, looking for new growth, new flowers, buds about the burst open with sweet colour. It does sound a bit silly, but it gives me hope and happiness in winter, the season that is most likely to see me feeling down.

Here are a few ideas for injecting some much needed life and colour into your garden over winter. Some are good for this year, others to keep in mind for next year.

My Hardenbergia 'Edna Walling Snow White' is starting to bloom, and it is so, so, so pretty. If you have a fence or a pergola you'd like to grow something on, these little gems are perfect. They're native, they're easy peasy to maintain and they will grow quite quickly - just provide a trellis or some wire from them to grow along. The flowers start in winter and continue through spring, and they are just super cute. I love having green walls in the backyard - it makes the space feel even bigger.


At the markets on Saturday I spotted a vendor selling potted ornamental kale and had to have one. They are everywhere these days, but with reason. The colours are gorgeous and they bloom in winter, which is what I'm after.

They grow well from seed, and you'll need to plant them late summer/early autumn to get the blooms in winter. They like a sunny spot and will tolerate frost. (Apparently, the colder the weather the more colour you'll get in the bloom). They're perfect to plant in herb/ornamental beds as replacement plants over winter, when some of your herbs or perennials die off in the colder months. They also look gorgeous as a winter edge planting, maybe along a path?


Ah, my sweet peas. Progress is good but slow. They've been super easy to grow from seed, and just need a sunny, open position. I'm keeping an eye on them, to make sure they keep attaching to the supports as they get taller, and keep the water and seaweed solution up to them when I remember. They should bloom in another couple of months, and I will hopefully have vases and vases of beautiful fragrant blooms for a few months after.


Lastly, my kangaroo paws have started to bloom again. Some are summer flowering, but my Bush Gems start flowering in winter and last all the way through spring, which is wonderful. Juts pick one up from your local nursery, pop it in a pot or in the ground, add some slow-release low-phosphorous fertiliser every six months and water it occasionally and it'll be great. They're fairly hardy, but do enjoy a hard prune after flowering (cut them all the way back to the ground and make sure to keep the centre of the plant clear of dead leaves and debris). Cut the flowers to keep inside - they keep really well in a vase - and the plant will send up more and more in a show of gratitude. Win:win!

None of these are hard to grow, at all, otherwise I wouldn't be growing them! They just give a bit of spark to the greyness that a garden can be in winter, so I love them by default. Let me know if you have any gems that you have in your garden. I'd love to hear about them!

Monday, June 20, 2011

Wonderful Weekend

Oh, Monday, you cruel mistress.

Today is a gorgeous bluebird day again though, which is lovely and most welcome. We had a fabulous weekend, where we actually managed to start and finish (can you imagine!?) a couple of little projects in the yard. The weather was so gorgeous it really felt like early spring, not the first month of winter, so we took it with both hands, thankyouverymuch.


Sparky raked up a bajillion leaves from the front and backyard, so I've got about ten bags of leaf mould on the go now, which is awesome.

Meanwhile I started and finished (!!!) a new little path in the backyard, that doubles as a garden edge. The new bed backs on to the new deck and we'll soon be planting three ballerina (dwarf) apple trees, as well as a dwarf mandarin tree and a lime tree that is currently up the back and not getting enough sun to fruit. The soil needs a bit of work first, but I'm super excited to see some progress in the garden, finally! (Meanwhile the painting is still not finished, but no worries.)


We also spent a couple of hours down at the local craft/produce market on Saturday morning, where they now have a heap of really great second-hand stalls. I had to hold myself back from the vintage garden tools, but did spend the princely sum of $2 on these four orange 70s-ish tin cannisters. Fun, aren't they?

Plus, there was many an hour spent in the backyard with my three delights. Two of them pint-sized and one Sparky-sized. Wonderful all-round!

I hope you had a productive weekend and soaked up the sun? xx


Friday, June 17, 2011

Happy-Making: Dirty Hands and Weekend Reads


(Blogger buggarised around and I only just saw that this post never made it up on Friday. So here it is... On Monday!!)

It's been a funny old week, but it's ending on a delightfully high note. Not only did Sparky and I start our new exercise routine this morning (waking at 5am six days a week to do either yoga/jog) and it felt goooood, but I've also been able to get my hands into the dirt and start working on our garden beds. It's my favourite domestic thing to do and after an hour or two in the garden, I feel like I've been on holidays. Or am flush with that post-exercise endorphin rush.

Plus the sun is shining (it's as windy as all get-out, but I'm not going to complain) and I got my new issue of frankie in the post today, just in time for the weekend! AND it's chock-full of awesome things that people make. Win:win:win!


Bonus: Tonight, I'm making caramel popcorn! My teeth are aching with happiness (or is that sugar?) already.

I hope you all have wonderfully content weekends, and much happiness results. xx

Play Time! Rainy Day Activities for Little Ones


Today is a beautiful, bluebird day (yay! gardening!) but the past week has been miserable and wet, wet, wet.

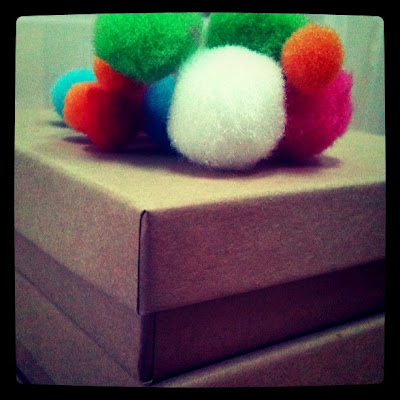
Yesterday I had two of my nephews over for the morning and I was at a loss of what to do activities-wise when the weather was so crappy outside. So I did a bit of rummaging in the useful box and decided to make some treasure boxes. I just grabbed some old kraft paper boxes I had left over from my jewellery days (but any box will do), some glue sticks, pencils, glitter, feathers, crepe paper etc and let them go crazy, decorating a special box to keep their precious treasures in.

The boxes were fun, but going berserk with the craft supplies was much more fun, it seems.


Anyway, it got me thinking that I really need to have a list of rainy day activities at the ready, because aside from DVDs, puzzles and drawing, I haven't really had much to offer. So I've done a bit of reading and put together a list of a few activities your kids/nieces/nephews/grandkids/neighbours will love on a crummy weather day:
  • Indoor obstacle course - Set up a course of chairs, towels, hula hoops, blocks, whatever, and create challenges for each obstacle. Eg: hop over the towel, slither under the chair, blow a marble across the carpet and build a tower of blocks. It should also help to burn off a bit of the ol' cabin fever that kids are prone to!
  • Sorting Games - Grab an empty egg carton, some different coloured objects/pieces of paper/bottle lids and get the kids to sort them into colours. Simple but it seems to work!
  • Build a table cubby - drape a couple of sheets over your dining table and presto! Indoor hideout.
  • Floor Roads - Put some masking tape on the carpet and create roadways, paths, rivers and bridges. Toy cars and prams are perfect to use on the roads.
  • Play Rice - (via How To Be a Badass Dad) Set up a table with cups, bowls, funnels etc and pour some rice/macaroni/beans/lentils etc out for the kids to play with. If they're anything like Isy, this will be right up their alley.
  • Playdough - Awesome by itself or combined with stamps, cookie cutters, rolling pins, paddlepop sticks etc. Playdough is ridiculously fun. And strangely therapeutic (for adults, I mean!)

PS: Glitter and kids under 5 = bad idea. Just sayin'.


Wednesday, June 15, 2011

Green Cleaning Toolkit: Bicarb Soda


The last of the big players in my Green-Cleaning Toolkit is bicarb soda (you can see the other Toolkit posts here.) I've already posted about some of the quirkier and non-cleaning related uses for bicarb, as well as the bicarb and lemon wedge miracle but thought I should list the many ways I use it to clean, as it is super effective.

Laundry Uses:

Softener/Deodoriser - Add a tablespoon-ish of bicarb to your wash for cleaner, fresher clothes. It also reduces the scratchiness you can sometimes get in linen.

Stain Remover - I use a commercial (natural) stain remover, but bicarb can be used as a stain remover too. Mix it with some water to form a paste and then apply to stains, leaving for at least five minutes, overnight for stubborn stains. Then wash as normal and hang to dry in the sun.

Cleaning Uses:

Heavy-Duty Scrub - Sprinkle surface with bicarb, then spray surface liberally with straight vinegar. You can leave the solution to take action for a few minutes, then, using a damp cloth scrub away. Rinse using a clean cloth and wipe over to dry. Great for stovetops and ovens.

Light Cleaner - Sprinkle some bicarb onto a damp cloth and use it to clean benchtops, tables, stovetop, chopping boards, microwave, vanity units, tiles etc.

Oven Cleaner - Make a paste with bicarb and water and apply liberally to a cool oven. Turn the oven on to warm for 30 minutes then use a damp cloth to wipe out the paste. Wipe clean. (For stubborn grease, apply the paste to a warm oven and then leave it overnight.)

Other Uses:

Carpet Deodoriser - Sprinkle onto carpet, leave for a few hours and then vacuum as usual. Great for car carpets in particular.

Spill Clean-up - For liquid spills on the carpet, sprinkle the liquid liberally with bicarb, allow to soak up the spill, then vacuum.

Car Windscreen Cleaner - Remove stubborn bug splats by sprinkling with bicarb, wiping over with a damp cloth and wiping clean with a clean, dry cloth.
It's completely non-toxic, easy to find (grab the 1kg box from the supermarket - until I find where to buy it in bulk, that's the cheapest option) and really versatile. Paired with castile soap, vinegar and borax, you can clean pretty much anything in and around the house.

Tuesday, June 14, 2011

Cheap-As Tuesday: Curried Sausages

via caravan handmade

A daggy oldie, but a goodie in my book. Curried sausages find their way to our plates at least once a month during the cooler season.

You'll need:


8+ thin sausages (this is enough for Sparky and I plus leftovers)
1-2 onions, sliced
1+ cup frozen veges (peas, carrot, corn works well)
1 tbsp butter
plain flour
milk
curry powder
salt + pepper
steamed basmati/brown rice to serve

1. Pop your sausages into a saucepan of cold water, bring to the boil until cooked through (10 minutes or so).

2. Remove from saucepan, but keep the cooking water aside for later. Slice sausages into 1-2cm lengths, removing sausage casing if you want.

3. Heat butter in a hot frying pan then cook the onion till soft. Add approx 2 dessertspoons of flour and mix through the onion mixture, then add your curry powder to taste (we use at least one heaped teaspoon, which gives a nice spiciness). Combine well and add approx 1/2 cup cooking water, stirring well to remove any lumps. Add more as needed to create a thick sauce.

4. Add your sausages to the pan, mixing well. Then add approx 1/2 cup milk, combining well.

5. Let this simmer for a few minutes, adding more water/milk as needed. Once the sauce has thickened slightly, reduce heat and simmer for 15 minutes.

6. Add your veges, simmer for five minutes more, season to taste and serve with rice.

* This recipe is one I've made up myself, with bits taken from other recipes and experimentation. Sorry I can't be more accurate with the measurements and time. It's fairly hard to muck up though, and you can adjust as you go.

Get Out(side)! Plus the Clean-Out Continues...


Ahoy! I hope you all had wonderful long weekends? A pretty wet affair here in Sydney unfortunately. We managed to get one day's worth of outside work done though, which felt so, so, very good (nothing beats gardening and outdoor work to chill my mind and work my muscles) and we now know exactly where the vege garden will be going in a month or two, as well as the fruit trees, compost bins and chook run. I'm ridiculously excited! I'll be sure to take some photos of the work as it progresses.

Aside from the garden planning, I managed to have another big clear out of our storage room, and have culled another 4 big garbage bags of clothes and toys that can go to Vinnies. I also finally organised the craft cupboard and went through all my remaining jewellery stock. I only have one crate of it left, so it's gradually going. I can't tell you how much better I feel with every cull I do. Just releasing ourselves from the excess stuff we've accumulated is seriously liberating.

I estimate that I've got about another 6 crates worth of stuff that can go, it's just a matter of sorting through it all to find what I need to keep, what I really, really want to keep (remember: love it or get rid of it) and what can go.

Friday, June 10, 2011

Happy-Making: Instagram and Yoga

Geeking out for my regular Friday happy post. I'm so ridiculously addicted to Instagram (are you on it? let me know!) and have started to find excuses to take photos of pretty, unexpected things just so I can play around with them on IG. It's actually been great - it's seen me take note and appreciate the little things a bit more.


Also, I've always loved the idea of yoga, and any time I actually try it I find myself much more centred, chilled and just healthier in myself, but I've never had the cash or consistent time to make it a regular thing. About a month ago I found this yoga (for iPhone) app and it. is. awesome. Best $2.49 I've ever spent.

So if you're into yoga or interested in starting, I totally recommend it. (And I'm not being paid for this - it really has helped my state of mind so much, and in turn is a massive happy-maker.)

This long weekend is due to be a chilly one, but we're going to make the most of it, with a stew cook-off, maybe some painting, a bit of op-shopping and tons of chill time on the lounge. Maybe a red wine or two. Or three.

Hope yours is full of fabulousness too! x

Wednesday, June 8, 2011

Adventures in Op-Shopping: A Tale of Success and Woe.

Sorry for the recipe-heavy nature of yesterday - I guess the cold weather has my brain switched to the Food setting!

Last weekend was a busy one, but while I was waiting around for a doctor's appointment on Saturday morning I snuck into our local Vinnies for a quick peek. They usually have tonnes of kooky knick-knacks that are fun to look through, but the real gem is the furniture "showroom" downstairs. It's always hit and miss, and fun to have a look around.

I scored a great raw timber A1-sized frame for the princely sum of $3, that I have plans for (showcasing some of Isy's art and craft) and I spotted a delicious chest of drawers, that was screaming for a makeover and a new home in our living room (maybe even as a TV unit?)


I sent a picture message to Sparky that said something like: "$35?" but he sensibly reminded me that we actually need a lounge first. So I had to let her go. But it hurt just a little bit, I have to say.

I'm really enjoying the process of decluttering, but I'm also surprised by how much I'm enjoying scouring second-hand furniture shops, ebay and garage sales for new furniture for our house. I know it's not everyone's cup of chai, but I love the positive environmental implications of not buying everything new as a matter of course as well as the fact that these pieces have a history to them.

Bonus: this coming weekend is a long weekend (yay!) and it's also hard rubbish night for our area (double yay!) I am going to try and convince Sparky to take a scouting drive with me, but we'll see how successful I am.

Tuesday, June 7, 2011

Cheap-As Tuesday: Tuna and Vege Pie

My Meat-Free Monday resources are slowly drying up, and I'm needing to find some more quick, cheap and easy meat-free options. In the meantime though, I though I'd start posting some of my favourite thrifty meals, as this is where I come into my own. Sorry, Margaret Fulton, but I can feed my family for less than that tenner in your hand!


Tonight's dinner is actually a "kids" dinner, but Sparky and I dig it too, so it's win-win!
You'll need:

2 sheets frozen puff pastry, thawed
large tin tuna, flaked and drained
1+ cup of grated cheese
1 onion, finely diced 
1+ cups frozen veges (I use peas, carrots and corn)
OR tin corn kernels, drained
1 egg, lightly beaten

1. Combine tuna, onion, veges and cheese in a bowl.

2. Put one sheet of pastry in the bottom of a greased baking dish, and fill with the tuna mix.

3. Season if you'd like, then place the second sheet of pastry over the top, pinching/tucking it into the side of the dish, to get a fairly good seal.

4. Brush the pastry with the beaten egg and put into a preheated oven (200C) for around 25 minutes or until the pastry is golden and flaky and the filling is bubbling away.

We have ours with steamed veges, but it would be yummo with homemade chips, baked sweet potato or salad too.