Showing posts with label craft. Show all posts
Friday, August 26, 2011
DIY Gifts: Embroidery Messages
Embroidery has always been an intimidating craft to me. I never thought I could master something so intricate. But a recent visit to youtube (can't currently find the link, will update though) showed me that it doesn't have to be tricky, or intricate or even learnt.
All I needed was some aida fabric, an embroidery hoop, a needle and some embroidery thread. I freehanded with pen a little message for Isy-girl and started stitching in my own special way. I've since learnt that I'm using the split stitch, but as long as it works, I don't mind.
It's such a sweet, personalised way to pretty up a room, make an inexpensive house-warming gift, or tell someone you love them. Of course, the message is up to you, so you could make it a little sweeter, a little cheekier or a lot naughtier. ;)
Thursday, June 30, 2011
Repurposing: Craft By Using What You've Got
Sparky and I are still very much in the furnishing and decorating phase of the renovation (not to mention the painting phase...ahem) and we're on the look out for quirky bits and pieces to adorn the walls. Proviso: we don't have a lot of cash to spend on this stuff at the moment, so we've been looking at what we already have and ways to reuse and repurpose it into wall 'art'(?).
I subscribe to frankie, and every issue they include a pretty wall poster by an emerging artist. Last issue was a world map, which I loved. I'm kind of past the whole "stick posters to the wall with Blutac" thing - it just reminds me of my high school days way too much (Jonathan Taylor Thomas, I'm talking about you in particular) but I wanted to see it on the wall somehow.
I dug around in my project box (where I keep odd photo frames, cardboard, paper and fabric offcuts etc) and found some old white frames that I've lost the glass for. Perfect! I cut the map to fit and presto! I already had another white frame decorated with felt offcuts, which coincidentally matched the map colours well, so I think I'll hang these three together somewhere.
![]() |
| From these... |
![]() |
| ...to these! |
I did something similar with more felt offcuts a few weeks ago, and while the photo is craptacular, I'm actually really happy with the result. I showed the mirror repurpose a few weeks ago, and these pieces are just continuing the theme.
Isy helped me with the top right-hand piece, hence the reason it's much more beautiful than the others.
I really love being able to pull things together from scrap and leftovers. Sure, it's not high art. It's probably not even art at all. But I love it nonetheless.
Labels:
craft,
decorating,
green living,
interior,
repurposing,
the home,
things you can do,
tips
Friday, June 17, 2011
Play Time! Rainy Day Activities for Little Ones
Today is a beautiful, bluebird day (yay! gardening!) but the past week has been miserable and wet, wet, wet.
Yesterday I had two of my nephews over for the morning and I was at a loss of what to do activities-wise when the weather was so crappy outside. So I did a bit of rummaging in the useful box and decided to make some treasure boxes. I just grabbed some old kraft paper boxes I had left over from my jewellery days (but any box will do), some glue sticks, pencils, glitter, feathers, crepe paper etc and let them go crazy, decorating a special box to keep their precious treasures in.
The boxes were fun, but going berserk with the craft supplies was much more fun, it seems.
Anyway, it got me thinking that I really need to have a list of rainy day activities at the ready, because aside from DVDs, puzzles and drawing, I haven't really had much to offer. So I've done a bit of reading and put together a list of a few activities your kids/nieces/nephews/grandkids/neighbours will love on a crummy weather day:
- Indoor obstacle course - Set up a course of chairs, towels, hula hoops, blocks, whatever, and create challenges for each obstacle. Eg: hop over the towel, slither under the chair, blow a marble across the carpet and build a tower of blocks. It should also help to burn off a bit of the ol' cabin fever that kids are prone to!
- Sorting Games - Grab an empty egg carton, some different coloured objects/pieces of paper/bottle lids and get the kids to sort them into colours. Simple but it seems to work!
- Build a table cubby - drape a couple of sheets over your dining table and presto! Indoor hideout.
- Floor Roads - Put some masking tape on the carpet and create roadways, paths, rivers and bridges. Toy cars and prams are perfect to use on the roads.
- Play Rice - (via How To Be a Badass Dad) Set up a table with cups, bowls, funnels etc and pour some rice/macaroni/beans/lentils etc out for the kids to play with. If they're anything like Isy, this will be right up their alley.
- Playdough - Awesome by itself or combined with stamps, cookie cutters, rolling pins, paddlepop sticks etc. Playdough is ridiculously fun. And strangely therapeutic (for adults, I mean!)
PS: Glitter and kids under 5 = bad idea. Just sayin'.
Monday, June 6, 2011
Repurpose Me: Unloved Mirror
| Before. |
Happy Monday everyone! I hope you had wonderful weekends? Ours was fairly packed with friends and family, so it was busy, but in a really especially very nice way. And bonus: I'm finally starting to feel better.
A few months ago, my sister and I co-hosted a garage sale, and while we sold almost everything we wanted to part with, I did mange to come home with a box full of new (old) things. One of them was an outdoor mirror that had certainly seen better days. I considered just hanging it in the garden somewhere, as is, but liked the idea of giving it a new outfit and putting it to use in the house instead.
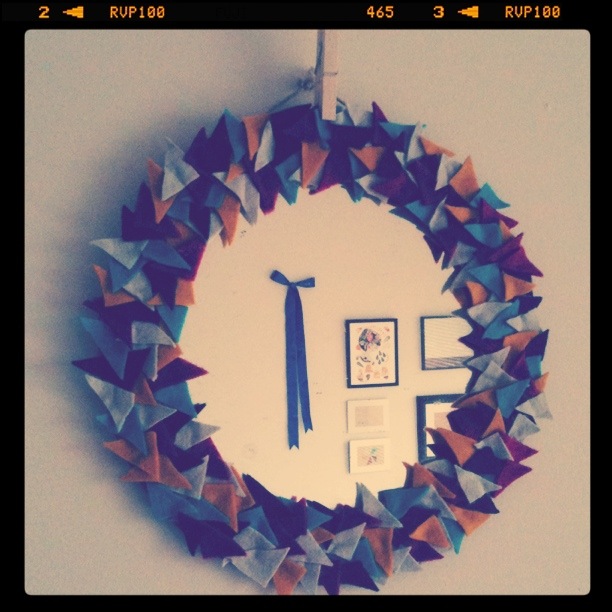
I've been working on a felt wreath for the house for a month or so, and have hundreds of little triangular felt offcuts that were too good to waste, so I kept them aside until I thought of what I could do with them. (I also used some of them to for little wall hangings a few weeks back).
So armed with my hot glue gun and about an hour, this is what I came up with:
| After. |
It's certainly cheerful and a vast improvement! Bonus: it fills in a blank spot on our walls (been blank going on 2.5 years now - well done us!) and it cost me zero dollars. Win: win: win.
Labels:
craft,
felt,
garage sale finds,
repurposing,
reuse,
round mirror,
scraps
Tuesday, May 24, 2011
Repurposing: Art by Repetition
![]() |
| via design*sponge |
A few weeks ago, I spotted this amazing piece of art featured on design*sponge. It was made using bus or train tickets (admitedly very cool and colourful tickets from San Fransisco, but tickets nonetheless) and it got me thinking about what I could put together, using otherwise unused multiples.
I have a bajillion plastic bits and bobs in the storeroom, left over from my Trove days, and these white plastic squares were perfect and easy to put together. I just used tiny balls of Blutack to stick them to the kraft paper, so I was able to reposition them if need be.
Obviously, this one and its twin still need to be hung on the living room wall, but I was so taken with the idea of using everyday or unused items in multiples to create a piece of art or a wall hanging, that I had to share.
Other possibilities are:
- train/ferry/bus tickets
- buttons
- ribbon
- wool/string
- drinking straws
- bottle tops
- corks
- confetti
![]() |
| via Sharon Whelton on Etsy |
Apologies for no Meat-Free Monday yesterday. I've been struck with this tummy bug again and the last thing I wanted to consider was food. It'll be back next week though!!
Labels:
craft,
decorating,
inspiration,
interior,
repurposing
Tuesday, May 17, 2011
Play Time! Bubble Painting
![]() |
| Excuse the crummy iPhone shots! |
Isy and I spent a good hour playing with this one afternoon, which is quite good considering her concentration span doesn't often stretch longer than an episode of Charlie and Lola (ie 10 minutes). It's super easy to set up, really genuinely fun to do (for both parents and kids) and messy/creative/fast/satisfying enough to entice pretty much everyone.
Just a note, you probably want this to be an outside craft session as it can get a little messy. And maybe some old clothes. Because when I say "a little messy" I mean, "the potential is there for this to get crazy messy."
You'll need:
dishwashing liquid (I just used the trusty castile soap)
liquid food colouring
plastic cups
stirrers
bubble wand
paper
Just pour a little bit of soap into each of your plastic cups and add a few drops of food colouring to each cup. It would be fun to mix the colours up and come up with some really pretty options, but we just went with the stock-standard colours that the colouring came in - red, yellow, green, blue. Mix with a stirrer and you're ready to go.
Dip your wand into the bubbles and blow towards the paper. I really loved the delicate patterns you can create, as well as the unpredictability of it. Isla on the other hand loved mixing the different coloured bubble mixtures together, Mad Professor style.
Wednesday, May 4, 2011
Cheap, Quick, Handmade Mothers Day Bouquets
I'm still on my "handmade, homemade, vintage or repurposed" gift challenge, but I'm going in with my sisters to buy my mum a Mothers Day pressie that doesn't quite fit into the HHVR categories. So I've been perusing the interwebs for something sweet, handmade and cheap (because the pennies be tight here at the moment) and have come up with a few options, that you may or may not be interested in yourself.
I'm keen on bouquets of things other than real flowers AND super-keen on pompoms. Behold, the joining of the two!
I made these two pompom flowers in the time it took my coffee to brew (and, if I'm being honest, to go slightly cold) so they are classified as a quick-fix craft for me. They really are very easy, and I followed the directions found here on domestic fluff, which includes a much much much easier pompom making method than the cardboard doughnut one I posted a while back. Praise!!
I have plans on making bunches of these for the mums that I know, and my fingers are itching to get into it.
Before I do though, I thought I'd share another non-flower bouquet that I put together a few weeks ago, using Japanese washi tape and skewers.
I just wrapped some tape around the blunt end of the skewers and snipped them into various flag shapes. A cute little handmade gift idea, or something to brighten up your bedside table or bathroom vanity.
(You can also make miniature versions using toothpicks, which are super-sweet as gift tags, place markets or cupcake toppers.)
Do you have anything special in the works for your mum/mum-in-law/sisters/grandma?
I'm keen on bouquets of things other than real flowers AND super-keen on pompoms. Behold, the joining of the two!
I made these two pompom flowers in the time it took my coffee to brew (and, if I'm being honest, to go slightly cold) so they are classified as a quick-fix craft for me. They really are very easy, and I followed the directions found here on domestic fluff, which includes a much much much easier pompom making method than the cardboard doughnut one I posted a while back. Praise!!
I have plans on making bunches of these for the mums that I know, and my fingers are itching to get into it.
Before I do though, I thought I'd share another non-flower bouquet that I put together a few weeks ago, using Japanese washi tape and skewers.
I just wrapped some tape around the blunt end of the skewers and snipped them into various flag shapes. A cute little handmade gift idea, or something to brighten up your bedside table or bathroom vanity.
(You can also make miniature versions using toothpicks, which are super-sweet as gift tags, place markets or cupcake toppers.)
Do you have anything special in the works for your mum/mum-in-law/sisters/grandma?
Labels:
craft,
craft tutorial,
gift ideas,
gifts,
handmade,
homemade,
pom poms,
tutorial
Tuesday, April 19, 2011
Quickie Craft: Wool-Wrapping
Do you ever get the unshakeable urge, the deep desire to just create? You don't know what or why, but you just need to make something. Anything. Now. Scones, a painting, a pathway, a short story, pom poms, a skirt. Whatever, just make it snappy.
Next time that urge strikes, keep this quick, cute craft in the back of your mind: wool-wrapping. I've seen bits and pieces about the interwebs and thought I'd give it a whirl while Isy and I were having crafty time. It's quick, easy, repurposeful and, provided you have some wool lying about somewhere, it's free!
You need:
a stick (pick one up off the ground or your backyard - just make sure it's not home to any little insects) twiggy is good.
some wool (bright colours look cute, but white or grey is surprisingly sophisticated)
- Start at one end and wrap the wool around your stick, tucking the end of the wool in to the first few rounds, to secure it.
- Keep wrapping till you reach the other end. Tie a knot in the wool and trim.
The end. (See? Super easy. Tutorial really unnecessary!)
![]() |
| a vaseful of these will look sweet and colourful. |
Wednesday, April 13, 2011
Play Time! The Useful Box.
![]() |
| Strainers are way fun, but a useful box is better |
Weird anecdotes aside, I've started to put together a Useful Box for Isla, when we get our craft on. It's a great way to recycle bits and pieces from around the house, and it means we can replicate lots of the crafts they make on Play School. (Almost all the crafts on Play School are made with toilet rolls, masking tape, crepe paper and paddle pop sticks. Totes inventive!) Not all of it is recycled, but some are party leftovers and others are from cheapy shops, like The Reject Shop.
So far I've got:
- egg cartons
- toilet rolls
- glad wrap/foil rolls and boxes
- pasta boxes
- ribbon and fabric scraps
- pegs
- wool
- pipe cleaners
- googley eyes
- mini pom poms
- paddle pop sticks
- plastic cups
- paper plates
- stickers
- newspaper
- tissue paper
- old magazines
- butchers twine
- balloons
- felt
- rubber bands (from our newspapers)
- crepe paper
If you're looking for a humongous list of creative play time activities for your little ones, nieces, nephews or neighbours' kids, or if you're just keen on making puppets out of toilet rolls, check out the Play School activities listed here. Many a winters day will be had...
Labels:
craft,
green living,
kids,
play,
recycling,
repurposing,
things you can do,
tips
Tuesday, March 15, 2011
Crafty Tutorial: Pom Pom Wall Garland
A while ago I mentioned how enamoured I was with pompom garlands, and over the past few weeks I've been slowly working on my own version. I finished the mini one last night and thought I'd share a quick how-to (they're super dooper easy though - you may not need a how-to!) and some of photos.
You'll need:
- a few balls of wool
- some scrap cardboard
- a compass or various sized tins/drinking glasses
- scissors
- time
1. Using the compass or tins or glasses, trace two large circles on the cardboard, with two smaller circles inside. Ensure that the smaller circles are in the exact centre so you get nice, even pompoms.
2. Cut out the outside circle, and then the inside circle on each of your pieces of cardboard. This should leave you with two cardboard doughnut-type shapes. They don't have to be beautiful, don't worry!
3. Chase your little helper around and retrieve your cardboard rings.
4. Measure out a length of wool (I usually do about three armlengths at a time, to stop it from getting too tangled) and start wrapping the ring.
5. Keep doing this.
6. And doing this.
7. Until you can do it no more, or until the wool won't fit through the middle of the ring.
8. Using sharp scissors, separate the wool to find the cardboard rings and carefully cut the wool, making sure your scissors stay in between the two rings. Cut all the way around.
9. Cut a length of wool and wrap it around the centre of the pompom (between the two rings) several times. Tie it off nice and tight. Be sure to have enough length on the wool to be able to form the garland later.
10. Carefully cut the cardboard rings off the wool and remove them.
11. Trim any long bits of wool, fluff up your pompom and presto!
12. Repeat for as many pompoms you would like, or for however many episodes of Kell on Earth you wish to watch.
13. Using the lengths of wool attached to each pompom, tie them together in whatever way you wish, leaving some extra length at each end of the garland to attach it to your hook/nail.
14. String it up and admire your handiwork.
There's something cozy about these little fluff balls, cozy and homely. I'm working on a bigger one for maybe one of the hallways or our bedroom, not sure yet. Maybe both.
Labels:
craft,
craft tutorial,
decorating,
garlands,
interior,
the home,
tutorial
Monday, February 21, 2011
Play Time! Playdough Recipe
You need:
3 cups plain flour
1 cup salt
2 tbsp oil
approx 1.5 cups water
a few drops of food colouring
Method:
1. Mix dry ingredients together
2. Combine water and food colouring
3. Add sufficient water until dough is pliable but not sticky
Super duper easy, it makes more than enough for four kidlets to play with and you can store it in a plastic bag in the fridge for at least a couple of weeks.
Also, for something fun, you can cut shapes out of the dough using cookie cutters and bake them slowly in a mild-moderate oven. Fun times ahoy!!
Wednesday, February 16, 2011
Green Cleaning Tip: Eucalyptus Essential Oil
| Pom pom progress! |
In between garage sale preparation, trips to the doctors, crumb duty (seriously! where do they all come from??!) laundry, ironing and cooking it's been craft mayhem here. The weather's been a bit sucky so Isy and I are getting messy. It's fun. And I'm pretty sure Isla likes it too.
GREEN CLEANING TIP:
Love me some fresh-smelling eucalyptus oil, I really do. It's also a pretty handy addition to your green cleaning stash as it's a super-duper oil. It's antibacterial, antifungal, antiviral and good for your immune system. It can be mixed with water in a spray bottle (try around 20 drops to one cup of water) and applied to any areas that need disinfecting, such as table tops, door knobs, bathrooms etc. It gives such a beautiful, fresh scent too. Bonus!
You can buy it at most supermarkets (just make sure it's pure eucalyptus oil) or health food stores.
Handy tip: Lavender oil has very similar disinfecting qualities, so you could try the above spray using essential lavender oil instead.
Meanwhile, it's back to sorting through books and CDs here. The countdown to G Day is on!
Labels:
cleaning,
craft,
green cleaning,
ingredients,
sans chemicals,
things you can do,
tips
Tuesday, February 15, 2011
Crafty: Pom Poms!
Part of the Lavender Experiment, for me, is to decorate our home with handmade things, things that have a little piece of us in them, things that mean something.
I'm certain I could go and buy loads of pretty knick knacks all at once and have the decorating finished in a matter of days, but A) there's no fun in that, B) there's too much money in that and C) that doesn't express a great deal about us as a family.
I'm a big fan of quirky garlands at the moment and have been working on a woolen pom pom garland for the past couple of days. I forgot how long it takes to make pom poms the old-fashioned way, but I do find the repetitiveness therapeutic so I don't mind.
The progress on my own garland will be slow, I'm sure, but these gorgeous examples keep me inspired:
I'm certain I could go and buy loads of pretty knick knacks all at once and have the decorating finished in a matter of days, but A) there's no fun in that, B) there's too much money in that and C) that doesn't express a great deal about us as a family.
I'm a big fan of quirky garlands at the moment and have been working on a woolen pom pom garland for the past couple of days. I forgot how long it takes to make pom poms the old-fashioned way, but I do find the repetitiveness therapeutic so I don't mind.
The progress on my own garland will be slow, I'm sure, but these gorgeous examples keep me inspired:
![]() |
| From Honestly...WTF |
![]() |
| From Small Bird |
![]() | ||
| From Millalove |
![]() |
| From Honestly...WTF |
Labels:
about the experiment,
craft,
decorating,
garlands,
green living,
inspiration,
interior,
pom poms,
style,
the home
Subscribe to:
Posts (Atom)