Showing posts with label garden. Show all posts

Tuesday, September 6, 2011

5 Spring-time Gardening Jobs


I truly find my inner peace outside in the garden, and this time of year has no shortage of jobs for me to tackle. These jobs are quite general and apply to pretty much any type of garden:

- Weeding!! 
We're having a bumper year for weeds and I've already filled our garbage bin twice over with weeds from the garden and lawn. And I've still got the front yard to go.

- Pruning.
Most of our winter flowering natives are spent now, so I've given them a really good prune, which should encourage stronger, bushier growth in spring/summer. Otherwise they can end up looking weedy and stringy and all-round ugly.

- Fertilising.
The gardens and potted plants need a good fertilise in early-mid spring (low or no phosphorous for your native gardens), water, plus a seaweed treatment to encourage good, healthy growth.

- Mulching. 
Once the gardens are fed and watered, give them a nice layer of mulch. This will help suppress the weeds, maintain water levels once the weather warms up, enrich the soil and protect against big temperature fluctuations, which can happen all through spring.

- Transplanting/Editing. 
Any plant that's underperforming in its current position could be transplanted to a more suitable spot in the garden, to see if it will rally. While any plant that looks too far gone should be taken out. Sometimes you have to be cruel to be kind!
In other gardening news, we've decided to put the vege garden on hold until autumn or maybe winter next year, as we've just got too many other projects to work on over spring and summer. As excited as I am about growing some of our own food, it's another nod to living a simpler life by focusing on one job at a time, rather than spreading ourselves, our time, our energy and our money too thinly.

Bonus: getting the backyard tidied up means we can put the new-to-us chook shed in place and get us some chickens soon! 

Friday, July 29, 2011

Spring into Spring with Some Immediate Colour!


It's been a cold winter so far, and suffice to say, I'm really really really looking forward to spring this year...

Fortunately, everywhere I look there are traces of early spring appearing. We have some sweet little purple daisies popping up in the garden, the resident willy wagtails are back, as well as the teeniest of tiny little native finches. The magnolia has started to bloom and it's nearly August.

I'm so freaking excited that we only have one more month of winter left!


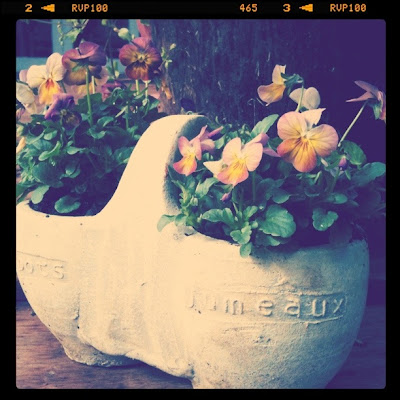
When we were prettying up the place for Toby's christening a couple of weeks ago, I bought a few pots of pansies to have around the front and back decks. This is by far the easiest way to inject a little bit of colour and life to the garden while we patiently wait for the warmer days and the boom of growth and colour they bring.

You can pick up pots like this for $1-2 at your local nursery/Flower Power/Bunnings etc and they will go in just about any pot you have. Clump a few together to fill larger pots or squeeze them into small pots like I have.

Regular potting mix is fine, as long as you water them in with a seaweed solution and maybe a fish emulsion or liquid fertiliser, to give you as many blooms as possible in their short lifespan. (These annuals aren't meant to last forever so once they're spent just pop them in the compost bin).

Cutting the blooms off occasionally and keeping water up to them when you remember will help get the most out of them too.

A good, cheap, quick project for the weekend!

Monday, July 11, 2011

In The Garden: How to Prepare Soil for a New Garden Bed


A chilly Monday morning to you! The weekends go by so fast, don't they? This one was particularly quick, as I seemed to cram a lot into just the two days. Unfortunately a lot of it wasn't very productive or fun (sorting laundry, anyone?) but we managed some good times.

Sparky was laid up all weekend with a super sore back, so we juggled kids and painting on Saturday, and I tackled the soon-to-be fruit tree garden bed on Sunday.

I've never had to prepare a brand new garden bed from scratch, so I did some reading and thought I'd tell you how I went about working on the soil, getting it ready for some apple trees in a few weeks' time. (I'm clearly no expert, so feel free to take or ignore the following as you see fit!


1. I bought a few bags of composted cow manure and chook manure from the nursery, as well as a bag of mushroom compost. Cons: All bagged manure/compost sold in Australia has to be heat-treated by law, so they are lacking some of the vitality of the natural manure you can source. Pros: Easy and a much quicker turn around.
If you're looking for the best way to prepare a bed, they say to buy manure straight from the producers (ie local farms, studs, dairies etc) and compost it yourself. Problem: it takes a long time to prepare it this way (at least a month or two before you should use the manure in your garden) and can lead to lots of weeds in your bed by way of undigested seeds etc.
2.  I added one bag cow manure, half a bag chook manure and a bag of mushroom compost to the bed (I was unsure about the amount of chook manure to use, as I know it's very rich and can burn the roots of some plants, so I erred on the side of caution).


3. Dug through the bed to at least 30cm and thoroughly combined the old soil with the organic material. This took longer than I thought, but was such a good workout in the chilly winter air (it was dark by the time I finished) that I didn't mind. I made sure to remove any bits of tree roots, stones, concrete I found, as well as to break up any clumps of dirt.

4. I levelled it out, raked the surface and gave the whole area a thorough water.

Ideally I'd add a thick layer of lucerne hay, to help the soil settle and prevent too much water loss, but I need to go for a drive to a farm to get it and I may not have time.
I'll leave it as is for a couple of weeks now and then take another look before we go and buy our bare-rooted apple trees.

I hope you had beautiful (chilly) weekends too??

Friday, July 8, 2011

In The Garden: Getting My Geek On


So it's been a tumultuous kind of week or two round these parts, but hopefully things are heading back to normal-ish. I can live in hope anyway!!

Aside from drinking a tonne of coffee, any down time this week has seen me embracing my inner garden nerd. I've had my nose stuck firmly in some of my favourite organic gardening books and planning what we'll be planting in August/September, and figuring out how our crop rotation system is going to work. I've also been planning out the front garden, which we'll plant in September/October.

Toby is having his christening next weekend, so it's all hands on deck to get the place looking good before then, but once that's over I'll be garden-crazy all the way. I really want to have the beds in place and the soil worked on by the time August comes. (Or maybe the middle of August.)     


There are a gazillion different gardening resources out there, but in the effort to keep it as simple as possible I've decided to choose two or three resources and just stick to their advice, otherwise I find one book will contradict another and I just wind up confused.

So in case you're keen on starting your own vege garden, I thought I'd list the resources I'm going to stick with as I build and start the garden.
Organic Gardening magazine is great, but they have recently released their third Essential Guide, and they are all excellent. You can buy the newest one online, and the others on special order or from ABC shops:
- Getting Started (bed construction, composting, soil, growing in pots etc)
- Fruit (A-Z of fruits to grow at home)
- Veges (A-Z of veges to grow at home)

City Food Growers website is awesome. There are free and paid versions of the subscription (the paid version is so worth the $50 a year) and it will personalise the planting details based on your postcode, as well as offer a list of the best plants for your area, when to plant, what to plant with and common pests and diseases. It's incredibly helpful and I find I look at it most days when I'm trying to figure out what I'll be planting.

Gardenate app for iPhone. It has less detailed information that the City Food Growers website but it has the benefit of being portable, and it has a Garden Notes section where you list what you planted and when, and it will track the harvesting progress for you. Handy to keep track of the details that seem so simple at the time but will get pretty fuzzy pretty quickly.
So that's where we're at currently. And thank goodness for the gardening distraction, otherwise the past weeks may have seen me consume way too much wine and chocolate! Gardening as therapy = win!

Tuesday, June 21, 2011

In The Garden: Getting Some Winter Colour Action

Winter is typically a time of the blahs in the garden, and most corners of our backyard would concur, but we do have a couple of bright spots, which I take a ridiculous amount of pleasure from. I go out and visit them every day, looking for new growth, new flowers, buds about the burst open with sweet colour. It does sound a bit silly, but it gives me hope and happiness in winter, the season that is most likely to see me feeling down.

Here are a few ideas for injecting some much needed life and colour into your garden over winter. Some are good for this year, others to keep in mind for next year.

My Hardenbergia 'Edna Walling Snow White' is starting to bloom, and it is so, so, so pretty. If you have a fence or a pergola you'd like to grow something on, these little gems are perfect. They're native, they're easy peasy to maintain and they will grow quite quickly - just provide a trellis or some wire from them to grow along. The flowers start in winter and continue through spring, and they are just super cute. I love having green walls in the backyard - it makes the space feel even bigger.


At the markets on Saturday I spotted a vendor selling potted ornamental kale and had to have one. They are everywhere these days, but with reason. The colours are gorgeous and they bloom in winter, which is what I'm after.

They grow well from seed, and you'll need to plant them late summer/early autumn to get the blooms in winter. They like a sunny spot and will tolerate frost. (Apparently, the colder the weather the more colour you'll get in the bloom). They're perfect to plant in herb/ornamental beds as replacement plants over winter, when some of your herbs or perennials die off in the colder months. They also look gorgeous as a winter edge planting, maybe along a path?


Ah, my sweet peas. Progress is good but slow. They've been super easy to grow from seed, and just need a sunny, open position. I'm keeping an eye on them, to make sure they keep attaching to the supports as they get taller, and keep the water and seaweed solution up to them when I remember. They should bloom in another couple of months, and I will hopefully have vases and vases of beautiful fragrant blooms for a few months after.


Lastly, my kangaroo paws have started to bloom again. Some are summer flowering, but my Bush Gems start flowering in winter and last all the way through spring, which is wonderful. Juts pick one up from your local nursery, pop it in a pot or in the ground, add some slow-release low-phosphorous fertiliser every six months and water it occasionally and it'll be great. They're fairly hardy, but do enjoy a hard prune after flowering (cut them all the way back to the ground and make sure to keep the centre of the plant clear of dead leaves and debris). Cut the flowers to keep inside - they keep really well in a vase - and the plant will send up more and more in a show of gratitude. Win:win!

None of these are hard to grow, at all, otherwise I wouldn't be growing them! They just give a bit of spark to the greyness that a garden can be in winter, so I love them by default. Let me know if you have any gems that you have in your garden. I'd love to hear about them!

Monday, June 20, 2011

Wonderful Weekend

Oh, Monday, you cruel mistress.

Today is a gorgeous bluebird day again though, which is lovely and most welcome. We had a fabulous weekend, where we actually managed to start and finish (can you imagine!?) a couple of little projects in the yard. The weather was so gorgeous it really felt like early spring, not the first month of winter, so we took it with both hands, thankyouverymuch.


Sparky raked up a bajillion leaves from the front and backyard, so I've got about ten bags of leaf mould on the go now, which is awesome.

Meanwhile I started and finished (!!!) a new little path in the backyard, that doubles as a garden edge. The new bed backs on to the new deck and we'll soon be planting three ballerina (dwarf) apple trees, as well as a dwarf mandarin tree and a lime tree that is currently up the back and not getting enough sun to fruit. The soil needs a bit of work first, but I'm super excited to see some progress in the garden, finally! (Meanwhile the painting is still not finished, but no worries.)


We also spent a couple of hours down at the local craft/produce market on Saturday morning, where they now have a heap of really great second-hand stalls. I had to hold myself back from the vintage garden tools, but did spend the princely sum of $2 on these four orange 70s-ish tin cannisters. Fun, aren't they?

Plus, there was many an hour spent in the backyard with my three delights. Two of them pint-sized and one Sparky-sized. Wonderful all-round!

I hope you had a productive weekend and soaked up the sun? xx


Wednesday, March 23, 2011

How Does Your Garden Grow?

The weekend just gone was a really insanely wet one, and I think it was only by sheer determination that I got outside and did a little bit in the garden. My rain jacket got a workout, put it that way, but it made me oh-so-ridiculously-happy.

I planted a flapjack in the chamberpot. It looked a lot healthier at the nursery, so I don't have high hopes for it, but we'll see how it fares.


I also dug up the liriope from the garden, where we plonked it about a year ago. We knew nothing about gardening then (still know very little now) and thought it was a native. It's not. And it would also take over the garden if we left it there, so out she came. I divided it into two and put it into two old pots though, which will go to the front deck.


We have a long, empty stretch of garden bed where my beautiful lavenders died off late last year (the shame!!). Too much water then not enough water meant very sad plants. We're not entirely sure what to put there yet, so rather than waste money I decided to throw a few snapdragon seeds in there for some winter flowers. I merrily emptied the packet in the turned soil and watered in well. Then I read the packet and saw that I had just planted 1500 snapdragon seeds. 1500! If it's not a spectacular display of colour then I will feel mightily ripped off. Of the 1500 I'd expect at least 12 of those seeds to give me some flowers. That's what I get for gardening in the semi-dark at 7:30 on Saturday night though, I guess!

Tuesday, March 22, 2011

Chamberpot Madness

So Saturday we made our way in the rain (seriously, crazy amounts of rain here. crazy) back to Dave's Furniture Bargains in Windsor, and my beautiful chamber pot was still there! Score 1 for the Brooke.

Unfortunately, it was $25. Score 1 for the Dave.

We bought it anyway. Score 2 for the Dave.

The Dave wins.


We have since decided that garage sales need to be part of our life. No-one is going to charge you $25 for a chamberpot at a garage sale.

And here endeth the lesson.

Wednesday, March 2, 2011

Project Compost: Thought I Should Add...

Common Weeds by SParadigm


The method of composting that I use, as outlined here and here, will leave you with volunteer plants. The heat generated in the bins isn't generally sufficient to kill off seeds that may be added to your compost bin, so be prepared for lots of tomato seedlings popping up in the warmer months. Not such a biggie for me, but for others maybe.

Also, that means I can't or don't compost weeds that have gone to seed or are in flower. Otherwise I spread the little buggers all over the garden. Yes, this isn't ideal but there's time issues at play. And I have limited time to deal with my compost bins. So the weeds get binned at this point. But I'm thinking of going the worm farm route soon, so maybe our slippery friends can munch on the weeds? I don't know. Will have to find out.

Thursday, February 24, 2011

Project Compost: Restart

Our sad compost bins.

 So the garden has been roundly neglected of late (more on this and what I'm doing to rectify the situation in a later post) and the poor old compost heap has seen many better days too. It was really flourishing pre-renovation, as I'd been working on it for about six months and had two big bins worth of garden gold almost ready to go. The little fairy wrens in the yard loved all the bugs that scattered every time I opened the lid and the willy wagtails were well pleased when I'd share some of the insects with them.

Then the builders came in and knocked both bins down, spreading my compost all over the backyard, on day one of the reno.

I get a really awful, wasteful feeling in the pit of my tummy every time I throw away food scraps (similar to the feeling I get using disposable nappies, truth be told) and I think about restarting the ol' compost bins - stat. Then life gets in the way, as usual, and the next time I think about it is when I'm tossing tonight's salad scraps in the bin.

But no more. This week fortnight-ish I will buy some manures, chop some garden waste and start the bins again.

I thought I could offer a very very basic rundown of how I build our compost bins, in case this is something you're interested in. Once it's set up, it really is a super simple way to cut down on your rubbish dramatically, and as a bonus you get the most beautiful plant food imaginable - for free!

*NB There is a huge amount of information out there on composting. There are books and blogs and websites all dedicated to the science of it. I'm not offering any scientific advice here, just a basic overview of what I do at home. This is likely not best practice. Probably not even close.

You need to get yourself two or three bins. Bunnings sell simple compost bins for around $30 each. These have a flip-top lid and an open bottom (the bottom needs to be open to allow worms and insects in, as well as allowing you to turn your heap easily). Place the bins somewhere they will stay pretty dry, and somewhere that makes depositing your scraps easy.

To start, I buy a couple of bags of manure from a farm nearby. Any type will do really, but chook poo is good. I add a layer of this to the bottom of the bin, followed by some grass clippings, some garden cuttings (if these are in large pieces, try breaking them up or running the mower over them first), some hay and a bucket of kitchen scraps. I generally keep these layers to around 10cm deep each, with the exception of the dense grass clippings, 3-5cm will do there. I also make sure not to compact the layers down as composting requires lots of air.

The compost bin has officially begun! I now add our kitchen scraps over the week, occasionally covering them with a handful of hay or leaves. Once the layer of scraps reaches around 10cm I start the layering all over again.

After around a month or so I lift the whole bin off the pile and move it to one side, leaving the entire pile exposed. I then use my shovel and garden fork to work through the pile, separating any big chunks and aerating the whole lot. Then I shovel it all back into the bin. I keep adding, layering, moving and aerating until the bin is pretty much full, then I leave it alone for a while. Depending on the weather it may be three months, it may be more. Occasionally, if I remember, I may turn the pile to help speed things along and get an idea of how the compost is cooking.

Once bin #1 is cooking, I start bin #2 using the same method. The theory being that once the compost in bin #1 is ready to use in the garden, bin #2 will be ready to cook. Then bin #3 is used for depositing scraps etc, while bin #1 stores the usable compost and bin #2 cooks away. In reality, the length of each stage varies and there will be times where you have two bins cooking and no usable compost.

At this early stage in my gardening career I can't worry about that so much, only take pleasure in the knowledge that my scraps will be fertilising my garden sometime in the near future. Hopefully yours will too!!

To stop this post from becoming any lengthier, I'll put together another post for later in the week that outlines the things you should and shouldn't compost in this type of pile.