Showing posts with label garden jobs. Show all posts

Tuesday, September 6, 2011

5 Spring-time Gardening Jobs


I truly find my inner peace outside in the garden, and this time of year has no shortage of jobs for me to tackle. These jobs are quite general and apply to pretty much any type of garden:

- Weeding!! 
We're having a bumper year for weeds and I've already filled our garbage bin twice over with weeds from the garden and lawn. And I've still got the front yard to go.

- Pruning.
Most of our winter flowering natives are spent now, so I've given them a really good prune, which should encourage stronger, bushier growth in spring/summer. Otherwise they can end up looking weedy and stringy and all-round ugly.

- Fertilising.
The gardens and potted plants need a good fertilise in early-mid spring (low or no phosphorous for your native gardens), water, plus a seaweed treatment to encourage good, healthy growth.

- Mulching. 
Once the gardens are fed and watered, give them a nice layer of mulch. This will help suppress the weeds, maintain water levels once the weather warms up, enrich the soil and protect against big temperature fluctuations, which can happen all through spring.

- Transplanting/Editing. 
Any plant that's underperforming in its current position could be transplanted to a more suitable spot in the garden, to see if it will rally. While any plant that looks too far gone should be taken out. Sometimes you have to be cruel to be kind!
In other gardening news, we've decided to put the vege garden on hold until autumn or maybe winter next year, as we've just got too many other projects to work on over spring and summer. As excited as I am about growing some of our own food, it's another nod to living a simpler life by focusing on one job at a time, rather than spreading ourselves, our time, our energy and our money too thinly.

Bonus: getting the backyard tidied up means we can put the new-to-us chook shed in place and get us some chickens soon! 

Friday, July 29, 2011

Spring into Spring with Some Immediate Colour!


It's been a cold winter so far, and suffice to say, I'm really really really looking forward to spring this year...

Fortunately, everywhere I look there are traces of early spring appearing. We have some sweet little purple daisies popping up in the garden, the resident willy wagtails are back, as well as the teeniest of tiny little native finches. The magnolia has started to bloom and it's nearly August.

I'm so freaking excited that we only have one more month of winter left!


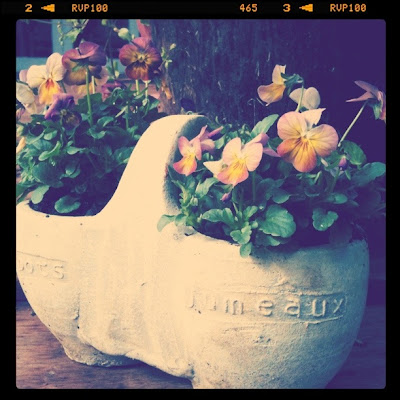
When we were prettying up the place for Toby's christening a couple of weeks ago, I bought a few pots of pansies to have around the front and back decks. This is by far the easiest way to inject a little bit of colour and life to the garden while we patiently wait for the warmer days and the boom of growth and colour they bring.

You can pick up pots like this for $1-2 at your local nursery/Flower Power/Bunnings etc and they will go in just about any pot you have. Clump a few together to fill larger pots or squeeze them into small pots like I have.

Regular potting mix is fine, as long as you water them in with a seaweed solution and maybe a fish emulsion or liquid fertiliser, to give you as many blooms as possible in their short lifespan. (These annuals aren't meant to last forever so once they're spent just pop them in the compost bin).

Cutting the blooms off occasionally and keeping water up to them when you remember will help get the most out of them too.

A good, cheap, quick project for the weekend!

Monday, July 11, 2011

In The Garden: How to Prepare Soil for a New Garden Bed


A chilly Monday morning to you! The weekends go by so fast, don't they? This one was particularly quick, as I seemed to cram a lot into just the two days. Unfortunately a lot of it wasn't very productive or fun (sorting laundry, anyone?) but we managed some good times.

Sparky was laid up all weekend with a super sore back, so we juggled kids and painting on Saturday, and I tackled the soon-to-be fruit tree garden bed on Sunday.

I've never had to prepare a brand new garden bed from scratch, so I did some reading and thought I'd tell you how I went about working on the soil, getting it ready for some apple trees in a few weeks' time. (I'm clearly no expert, so feel free to take or ignore the following as you see fit!


1. I bought a few bags of composted cow manure and chook manure from the nursery, as well as a bag of mushroom compost. Cons: All bagged manure/compost sold in Australia has to be heat-treated by law, so they are lacking some of the vitality of the natural manure you can source. Pros: Easy and a much quicker turn around.
If you're looking for the best way to prepare a bed, they say to buy manure straight from the producers (ie local farms, studs, dairies etc) and compost it yourself. Problem: it takes a long time to prepare it this way (at least a month or two before you should use the manure in your garden) and can lead to lots of weeds in your bed by way of undigested seeds etc.
2.  I added one bag cow manure, half a bag chook manure and a bag of mushroom compost to the bed (I was unsure about the amount of chook manure to use, as I know it's very rich and can burn the roots of some plants, so I erred on the side of caution).


3. Dug through the bed to at least 30cm and thoroughly combined the old soil with the organic material. This took longer than I thought, but was such a good workout in the chilly winter air (it was dark by the time I finished) that I didn't mind. I made sure to remove any bits of tree roots, stones, concrete I found, as well as to break up any clumps of dirt.

4. I levelled it out, raked the surface and gave the whole area a thorough water.

Ideally I'd add a thick layer of lucerne hay, to help the soil settle and prevent too much water loss, but I need to go for a drive to a farm to get it and I may not have time.
I'll leave it as is for a couple of weeks now and then take another look before we go and buy our bare-rooted apple trees.

I hope you had beautiful (chilly) weekends too??

Monday, June 20, 2011

Wonderful Weekend

Oh, Monday, you cruel mistress.

Today is a gorgeous bluebird day again though, which is lovely and most welcome. We had a fabulous weekend, where we actually managed to start and finish (can you imagine!?) a couple of little projects in the yard. The weather was so gorgeous it really felt like early spring, not the first month of winter, so we took it with both hands, thankyouverymuch.


Sparky raked up a bajillion leaves from the front and backyard, so I've got about ten bags of leaf mould on the go now, which is awesome.

Meanwhile I started and finished (!!!) a new little path in the backyard, that doubles as a garden edge. The new bed backs on to the new deck and we'll soon be planting three ballerina (dwarf) apple trees, as well as a dwarf mandarin tree and a lime tree that is currently up the back and not getting enough sun to fruit. The soil needs a bit of work first, but I'm super excited to see some progress in the garden, finally! (Meanwhile the painting is still not finished, but no worries.)


We also spent a couple of hours down at the local craft/produce market on Saturday morning, where they now have a heap of really great second-hand stalls. I had to hold myself back from the vintage garden tools, but did spend the princely sum of $2 on these four orange 70s-ish tin cannisters. Fun, aren't they?

Plus, there was many an hour spent in the backyard with my three delights. Two of them pint-sized and one Sparky-sized. Wonderful all-round!

I hope you had a productive weekend and soaked up the sun? xx


Wednesday, June 1, 2011

In the Garden: How to Make Leaf Mould

image via Self Sufficient UK

While today is actually the first day of winter (boo!) the majority of deciduous trees around us have still yet to lose all their leaves, which means two things: Mess and the opportunity to make leaf mould.
Sounds Gross. What is it?
It's basically the term used for rotted down autumn leaves. The gardening nerd in me knows that this stuff is beeeyootiful for your garden - it can be used as a soil conditioner (to improve the overall health of your soil) or as a gentle, rich mulch to help retain water and keep weeds at bay, and gardeners often refer to it as "precious gold". It's perfect for ferns and rainforest plants in particular, but will help enrich any soil in your garden by improving the water retention and overall health of the garden.

How do I Make it?

Super simple. Just rake up all your fallen leaves and give them a spray with the garden hose. You want them to be fairly wet, to help speed up the decomposition. Then fill some heavy-duty black plastic bin bags with your leaves, adding a handful of blood and bone every 30cm or so (this appears to be optional, but I trust the word of Gardening Australia!) Close your bags up, poke some holes in it with a garden fork and leave in a sheltered place, preferably on soil/grass, for at least a year.

So, this isn't an activity for those who are after instant gratification, but it is worthwhile. If nothing else, it gets me outside in the chilly winter air for a while, and gives me something for my garden for basically no cost.

How do I Know When it's Ready?

It will be crumbly and sweet-smelling, and resemble the look of regular compost. (Just a side note: you can't add many autumn leaves to your regular compost bin, as they don't easily break down in those conditions. Too many and it will slow your pile down.)

Sounds Good. Any Tips?

If you want the process to go a little quicker, try dumping all your leaves on the lawn and mowing over them. This will break them up, meaning they'll break down quicker. Also, there are special leaf mould compost bins available, which compress the leaves, apparently speeding the process up some more, so perhaps try keeping a weight of some sort on top of your pile. Maybe some timber or corrugated iron would do the trick.
So, if this ridiculous sinus infection goes away some time soon, this is what I plan on doing over the weekend. And, funnily enough, it makes me not dislike winter quite so much!